Download and Install
First, visit the homepage to download and install the version suitable for your system.
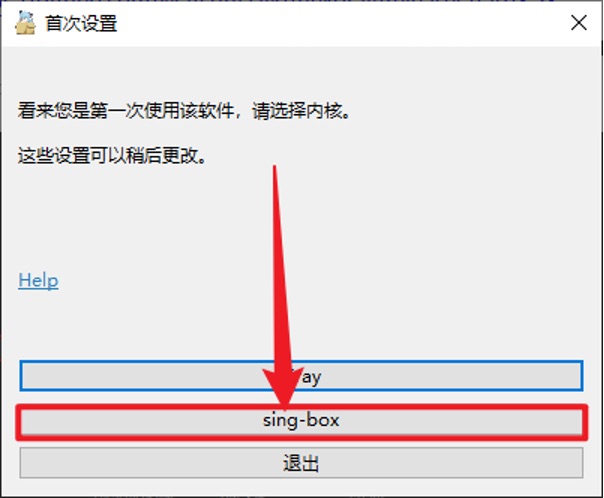
Choosing the Core
NekoBox for PC supports two cores:
- Xray: Widely used with good compatibility.
- sing-box (Recommended): Supports more new protocols and can perform better in some cases.
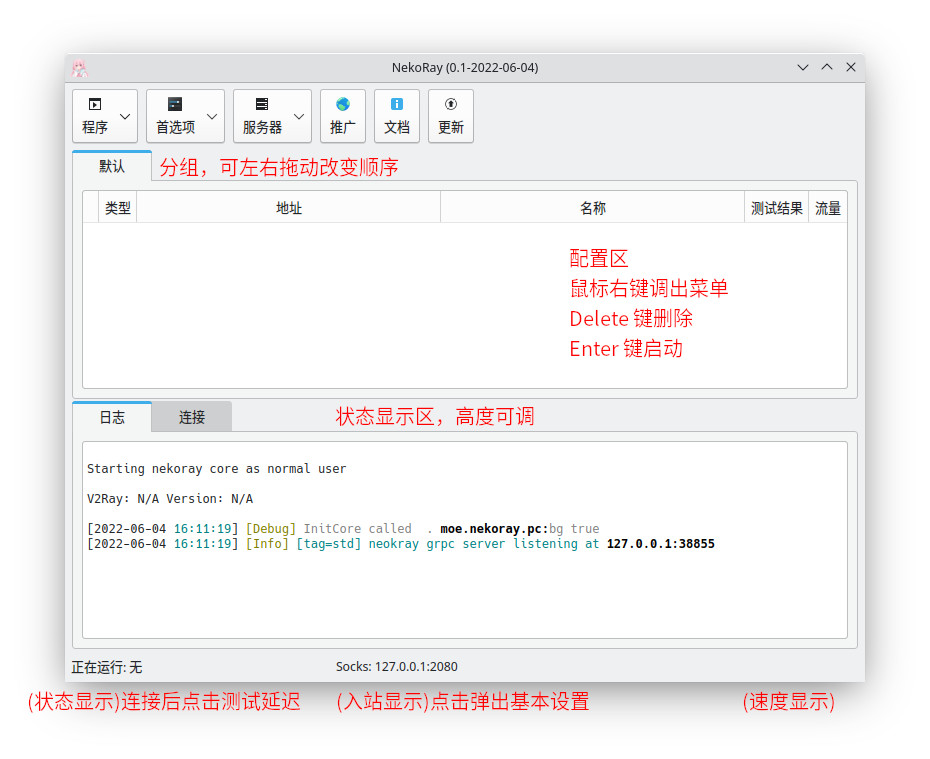
Interface Introduction
- Preferences: Includes group settings, routing settings, tun settings, etc.
- Servers: Node operation settings.
- Promotion: Author’s advertisements.
- Documentation: Relevant usage documentation of the software.
- Updates: For updating the software itself.
Adding Subscriptions
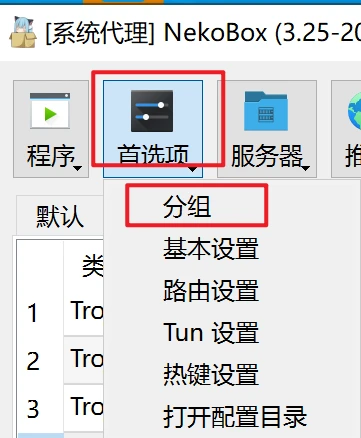
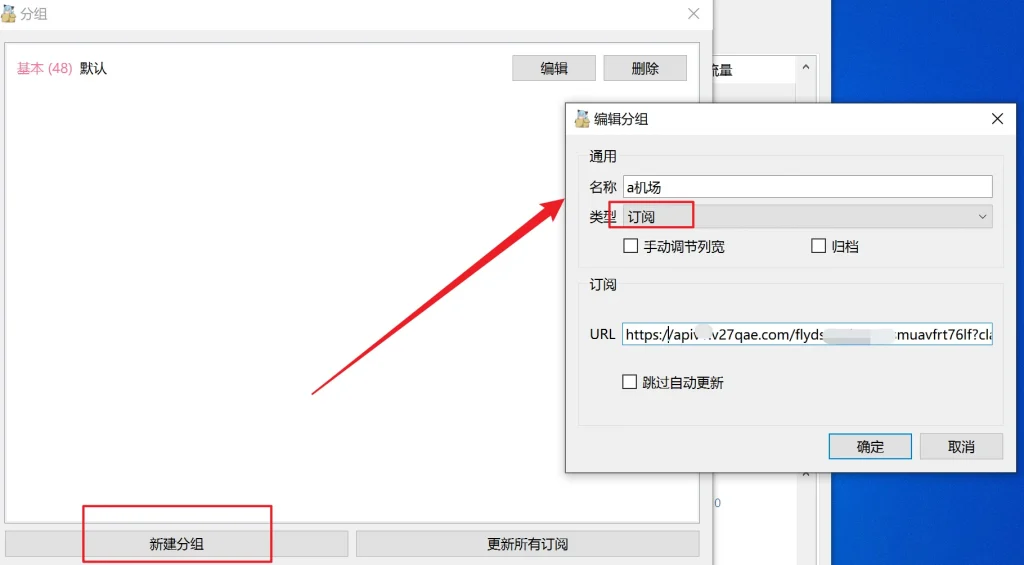
Click on Preferences – Groups.
Create a new group at the bottom left, choose subscription type, and fill in the subscription details.
Once added, the subscription list will be displayed. Click on update subscription to synchronize node information.
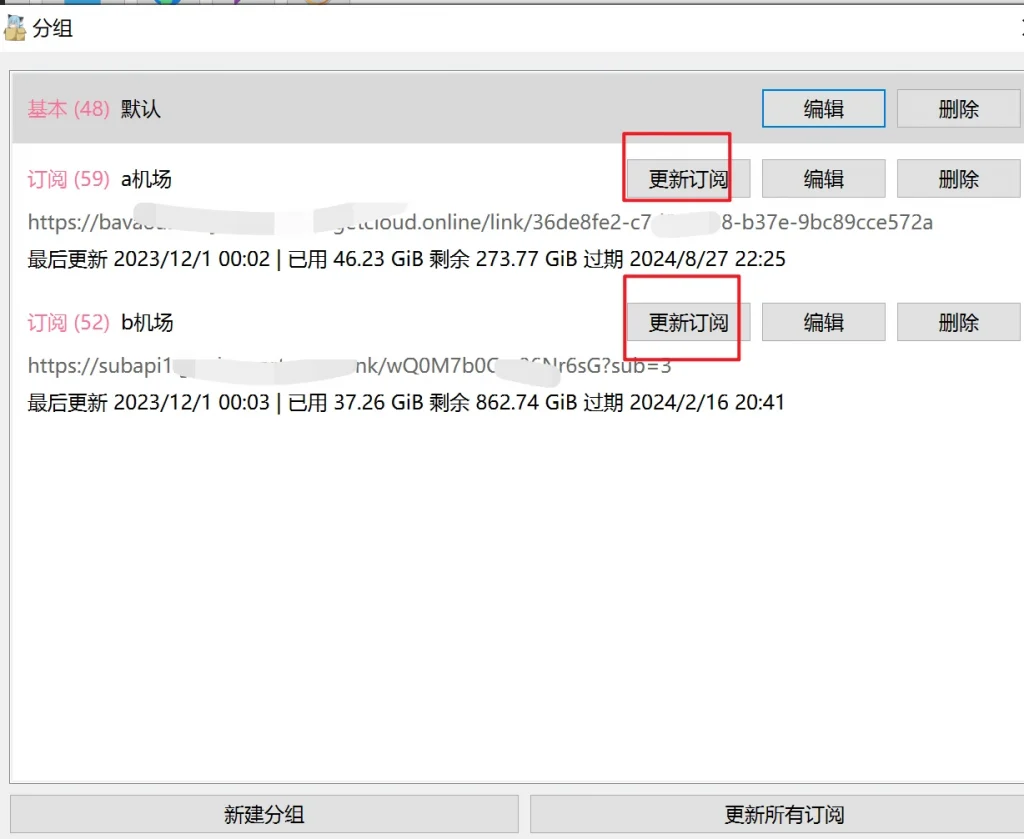
After synchronization, all nodes will be displayed below.
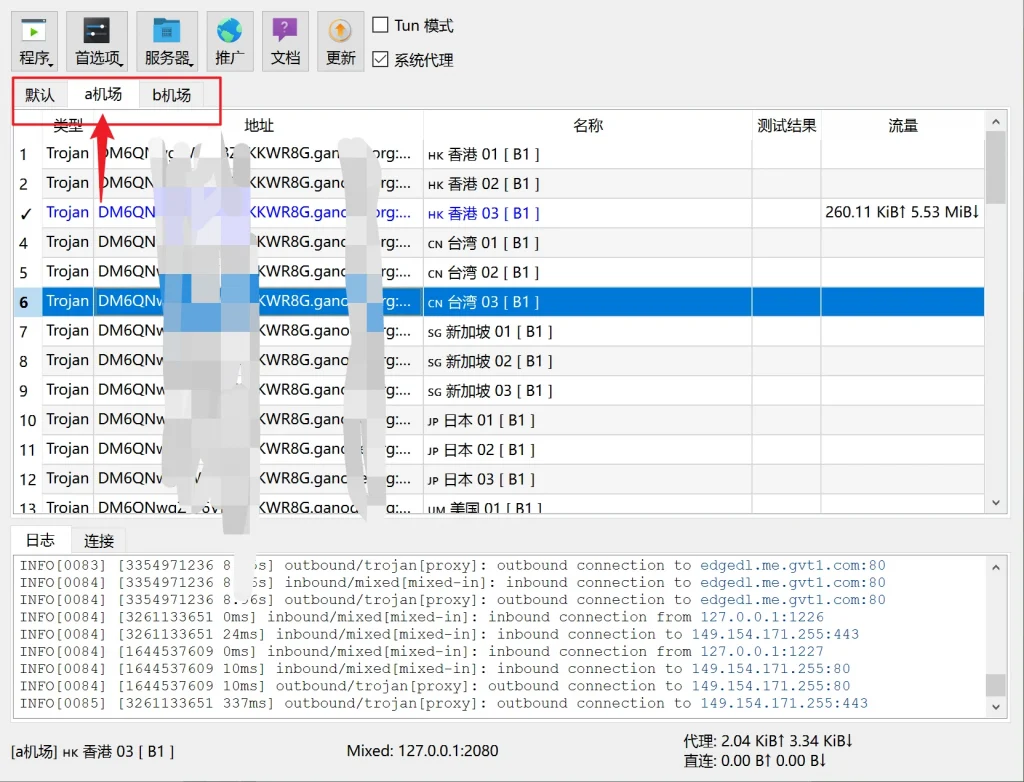
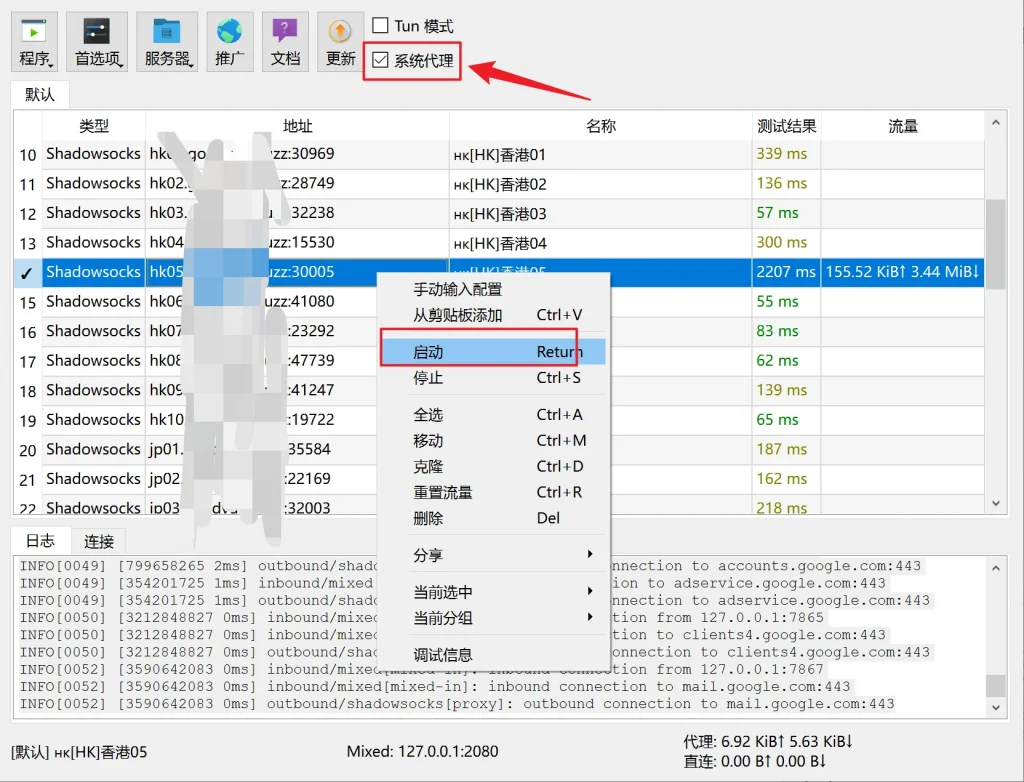
Selecting and Using Nodes
Right-click on a node – Current group, and select URL Test to test.
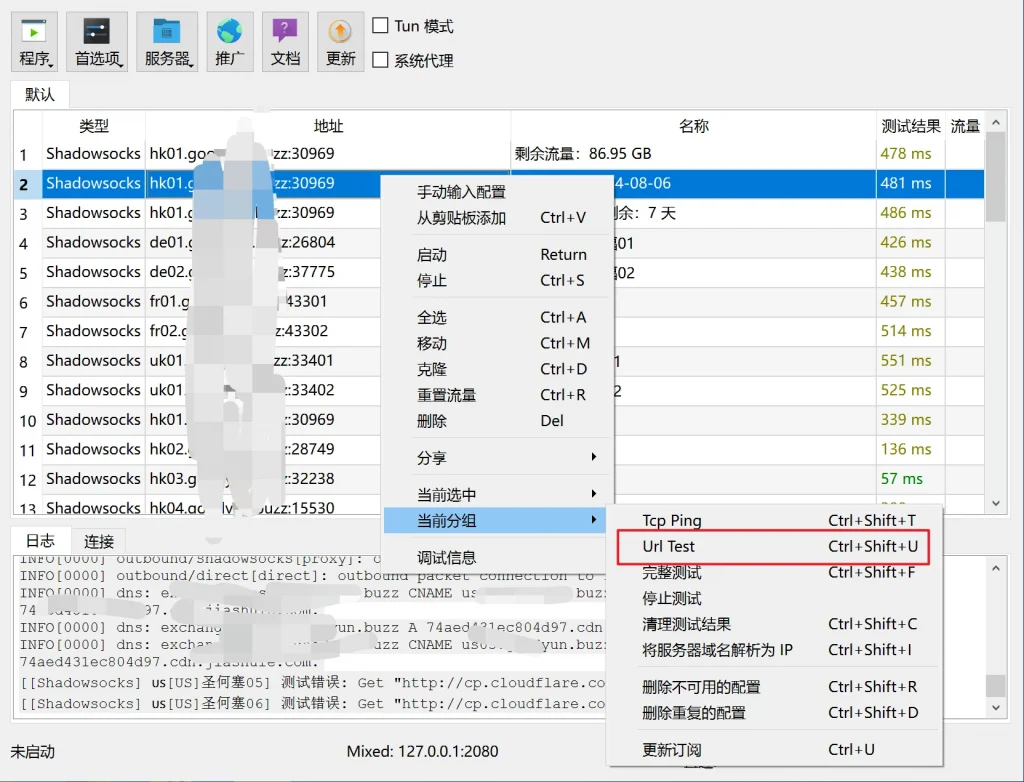
Choose a suitable node, right-click – Start to connect, and remember to check “System Proxy” above.
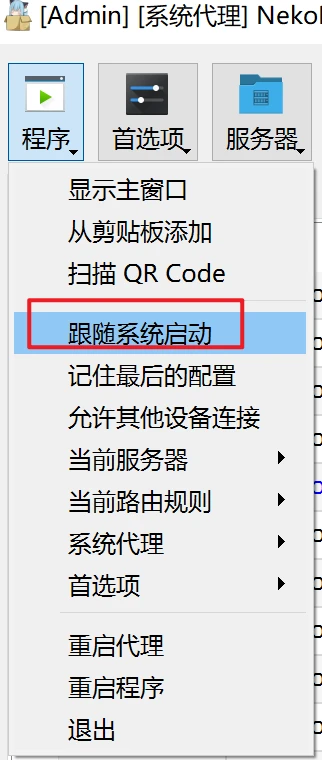
Setting Auto-Start with System
Click on the program in the top left corner and select to start with the system.
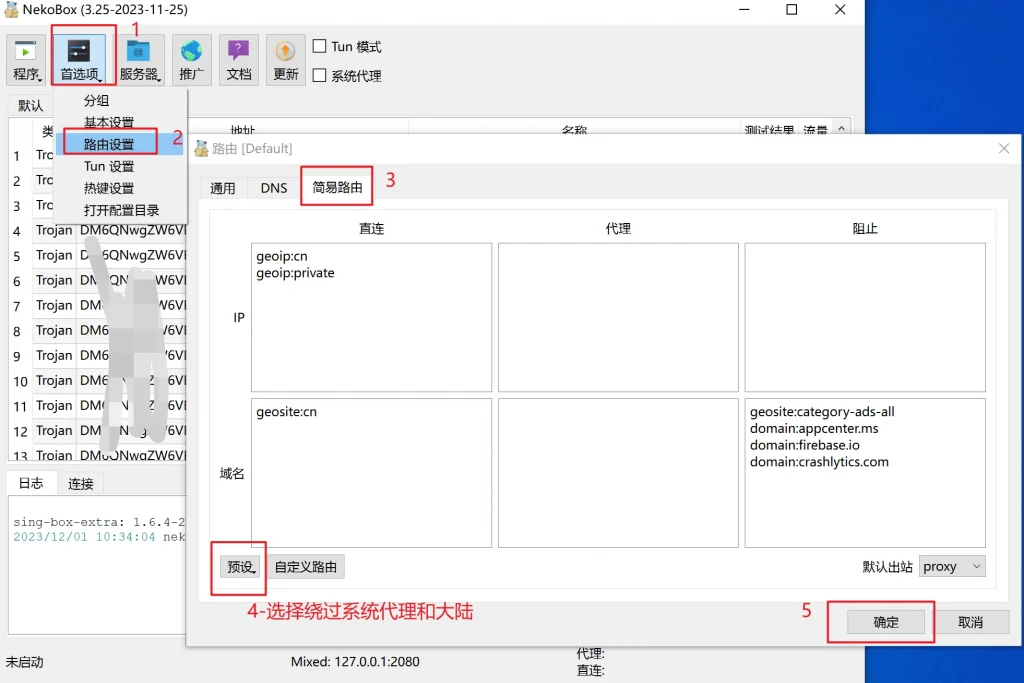
Setting Routing
By default, it’s set to global proxy. It’s recommended to set domestic websites to bypass proxy. Select Preferences – Routing Settings at the top. Then select Simple Routing, click Preset at the bottom left, choose “Bypass LAN and Mainland”, and finally confirm.
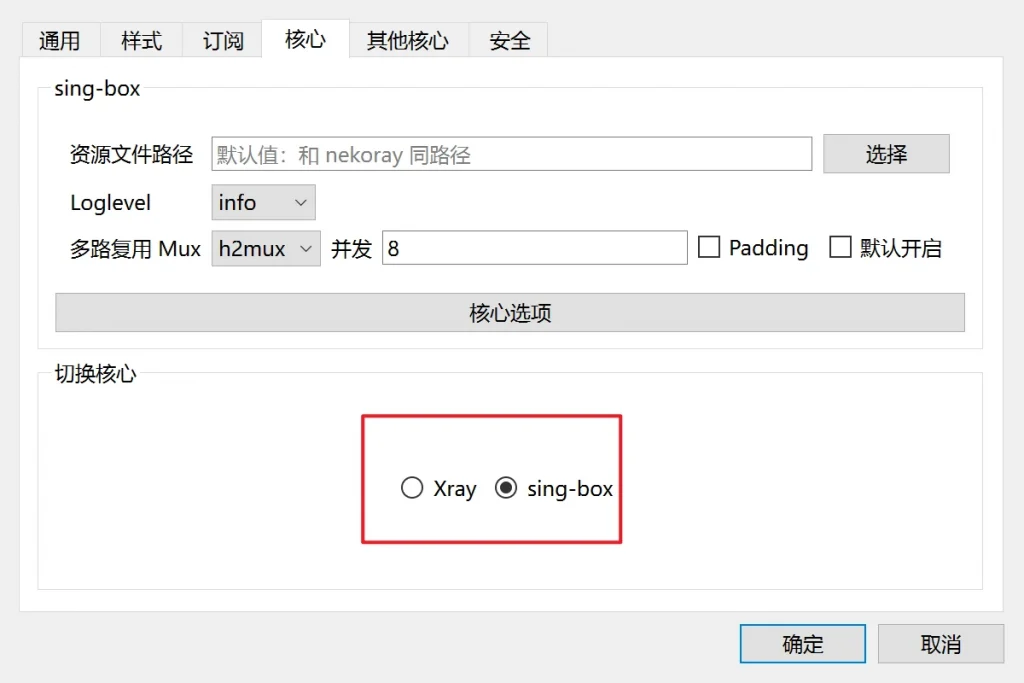
Switching Cores
If you prefer Xray, you can also switch in the core settings.